
After you have imported the ProFlares package into the project you are ready to get started.

Adding the Setup –
Before you can add any flares to the scene we need to add a ProFlares setup which consists of a number of GameObjects and most important a ProFlaresBatch. This is responsible for rendering the Flares.
To create the flare setup goto Window -> ProFlares -> Create Setup.
Note to NGUI users – If you already have a NGUI GUI in your scene, select the NGUI camera and then use the “Create on Selected Camera” Options instead. This Adds the ProFlare’s setup to your existing hierarchy.

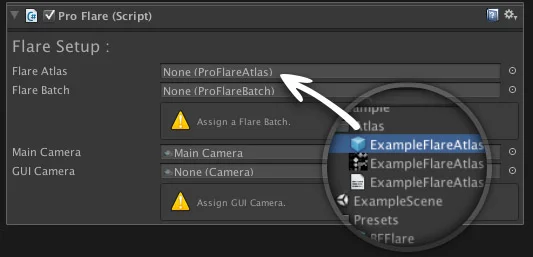
Next you need to assign a ProFlareAtlas to the ProFlareBatch. Either drag the example atlas or your own custom one, from the project window into the ProFlareBatch component.
To create the flare setup goto Window -> ProFlares -> Create Setup. That’s the FlareBatch setup.
Adding A Flare –
Next add a flare to the scene via Window -> ProFlares -> Create Flare.
Now drag the same FlareAtlas into the FlareAtlas slot on the Flare.
This should now automatically setup all the connections necessary.
Note – If you see two of the same flare, you more than likely just need to set the ‘Game/Main Camera’ not to render the layer that the ProFlareBatch is assigned to. If your working in a fresh project you may not have set any extra layers which may cause Layer 8 (ProFlares Default Layer) not to be available to unselect in the cameras Culling mask